


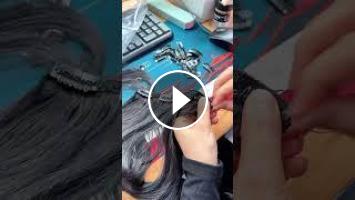
Looking to DIY your own clip-in hair extensions?
Here’s how to sew durable, lightweight, and removable extensions using Yiwigs virgin human hair ????
✅ Materials You Need:
100% 12A grade Yiwigs human hair bundles
Metal snap clips (with silicone grip)
Thread (matching hair color), needle
Scissors, comb, hair clips for sectioning
✂️ Step 1: Cut the Wefts
Cut weft strips into various lengths (6cm–25cm) depending on where you’ll apply them — sides, crown, or back.
???? Step 2: Attach Clips
Align the clips along the weft base and sew them firmly.
Make sure to secure both ends and the middle section with at least 2–3 stitch points per clip.
???? Use 2–4 clips per piece depending on width for stable, comfortable wear.
????♀️ Step 3: Style & Finish
Press with a hot comb or flat iron to set the hair. You can trim, curl, or color the clips for a custom, salon-quality look.
???? Want custom-made clip-ins?
Message us on WhatsApp: +86 191 2870 6026
???? Worldwide Shipping | OEM Welcome | Factory Price
#Yiwigs #ClipInHairExtensions #DIYHairExtensions #SewInClipIns #VirginHumanHair #HairVolumeBoost #HowToSewHairClips #HairAccessories #CustomHairClips #SalonLook #HumanHairClipIns
- Catégories
- Extensions Cheveux
- Mots-clés
- #LaceFrontWig, #HumanHairWig, #SyntheticWig
Ajouter un commentaire
Up Next
Autoplay
-
00:18

sew in extensions how to #seamless hair extensions near me #4c kinky curly clip ins #2 braid ponytai
-
00:31
Seamless Install Clip-Ins Extensions By Sew In Method????Natutal Leave Out Tutorial Ft.@UlaHair
-
11:00
I TRY LUXURY CLIP IN HAIR EXTENSIONS! BETTER THAN SEW INS ?! | MHOT REVIEW
-
00:27
No Sew-in No Glue Clip Ins On Natural Hair! Curly Extensions W/Feedin Braids Ft.#ULAHAIR
-
00:38
????No Sew-in No Glue Install Clip in Extensions! Natural Curly Human Hair Weft Ft.#ELFINHAIR Review
-
07:59
15 COIFFURES FACILES POUR LES PETITES FILLES
-
04:48

Comment faire une tresse sur le côté ? Tuto coiffure simple et belle avec tresse
-
05:52
10 IDÉES COIFFURES POUR CHEVEUX CRÉPUS | Shelby Bj
-
12:24

➳ 7 idées Coiffures sur Cheveux COURTS (longueur épaules) | L.A Hairstyle Inspiration
-
07:56
Coiffure pour tous les jours cheveux mi long/long
Commentaires