


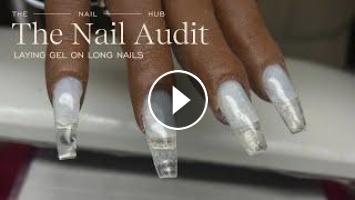
???? How to Float Hard Gel & Build the Perfect Apex | Sculpting Strong, Clean Extensions
Struggling with flat-looking gel extensions or dips across your nails? In this Nail Audit, Liz tackles a top-request topic from Sharita: how to float hard gel smoothly and build a strong, well-placed apex so your sculpted nails look polished, durable, and full of dimension. If you’ve tried tips, forms, or hard gel and gotten uneven shapes, this video dives into what tools, brush techniques, product quantities, and positioning really move the needle.
Whether you’re a newbie in sculpted nails or trying to refine your shaping, this tutorial will help you get that structure right—no more weak stress points, no more “humps” in the middle, just clean, strong nails that last.
✅ What You’ll Learn in This Video:
– Why the stress area above the natural nail free‑edge breaks without proper apex support
– How brush size affects your ability to float and shape hard gel for longer nails
– What a “wet layer” or “slip layer” is and how it helps self‑level hard gel
– How to place product (the “obscene dollop”) so apex builds naturally without dips
– Tips for using gravity and finger positioning to guide gel toward the free edge
– Common beginner mistakes: pressing, stabbing, or using too little product
– How to judge gel viscosity for floating vs holding shape
– Finish shaping: checking from side & front view, fixing sidewalls, smoothing edges
⏱ Timestamps
00:00 – Nail Audit Intro: Sharita’s struggle with floating hard gel & apex challenges
00:45 – Sharita’s before shots: flat shape, dips, thinning toward tip
02:00 – How stress areas cause snapping with flat, thin gel
03:15 – Choosing the right brush size (Size 4 vs Size 6) for control & volume
04:30 – Wet/slip layer demo: prepping entire nail with a base of product
06:00 – “Obscene amount” of gel & how to float it without rushing or pressing
07:20 – Floating technique: roll, make contact & glide down to free edge
08:40 – Using gravity by tipping the finger or flipping upside down
09:30 – Checking reflections & light lines to spot dips/humps
10:15 – Saving product: when to add more & when to use what you’ve got
11:00 – Final shape on cured version vs the flat demo comparison
11:45 – Practice tips: float gently, let the gel do work, avoid over‑handling
???? LOVE THIS VIDEO AND WANT MORE?!
Support my channel by hitting the JOIN button for exclusive content and member perks!
???? Shop the Website – https://www.thenailhub.com
???? Instagram – https://www.instagram.com/thenailhub
???? TikTok – https://www.tiktok.com/@thenailhub
???? Facebook – https://www.facebook.com/thenailhub
???? Business Inquiries: sales@thenailhub.com
???? Tag #thenailhub or @thenailhub to be featured!
#HardGel #FloatGel #ApexBuilding #SculptedNails #NailTechTips #GelShape #StrongExtensions #TheNailHub #NailAudit #BuilderGelTutorial
- Catégories
- Ongles
- Mots-clés
- float hard gel, apex building tutorial, hard gel sculpting tips
Ajouter un commentaire
Up Next
Autoplay
-
00:27

Nail Tips????Quickly Shape & Smooth Gel for the Perfect French Manicure!????#nails #frenchnails
-
00:44
Builder gel - the secret to strong & long-lasting nails ????????
-
27:32
BITTEN NAIL TRANSFORMATION???? I RUINED MY NAILS AND CUTICLES | STEP BY STEP HARD GEL TUTORIAL
-
00:17
Comment réparer un ongle rapidement avec le gel Perfect Shape ? #nails #tutorialnails #geluv
-
00:14
the PERFECT versatile shade for this fall | diy gel nail tutorial | #nails #tutorial #nailart
-
07:59
15 COIFFURES FACILES POUR LES PETITES FILLES
-
04:48

Comment faire une tresse sur le côté ? Tuto coiffure simple et belle avec tresse
-
05:52
10 IDÉES COIFFURES POUR CHEVEUX CRÉPUS | Shelby Bj
-
12:24

➳ 7 idées Coiffures sur Cheveux COURTS (longueur épaules) | L.A Hairstyle Inspiration
-
07:56
Coiffure pour tous les jours cheveux mi long/long
Commentaires